今回はActionSheetの使い方について説明します。
環境
- Xcode12.5.1
- iOS14.6
- スクショはiPhone12Pro Maxで撮影
基本的な使い方
まずは基本的な使い方を確認しましょう。
struct ContentView: View {
@State private var shownActionSheet = false
var body: some View {
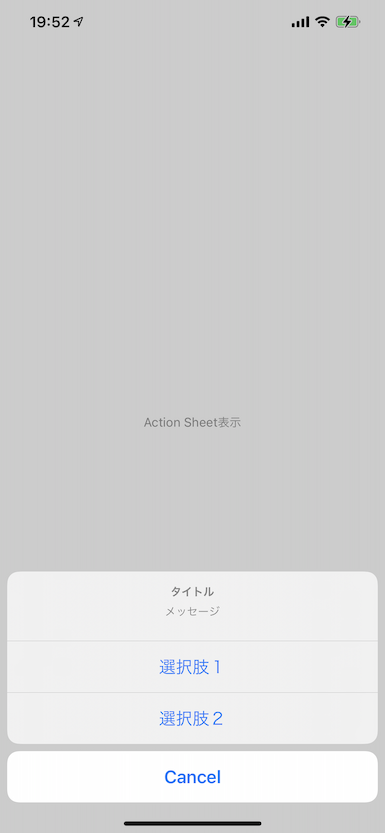
Button("Action Sheet表示", action: {
self.shownActionSheet = true
})
.actionSheet(isPresented: $shownActionSheet){
ActionSheet(
title: Text("タイトル"),
message: Text("メッセージ"),
buttons:[
.default(Text("選択肢1")){
print("選択肢1")
},
.default(Text("選択肢2")){
print("選択肢2")
},
.cancel()
]
)
}
}
}
shownActionSheetはActionSheetが表示されているかどうかを管理するフラグです。
SwiftUIが値の変更を監視するので、@Stateをつけます。Buttonをタップされたらtrueになるように実装しましょう。
Buttonに対して.actionSheet()というモディファイアをつけます。引数には先ほど用意したフラグshownActionSheetを渡します。
あとはActionSheetを定義するだけです。引数はタイトル、メッセージ、ボタンです。ActionSheet内のボタンを押された時の処理は、print()の部分に書いてください。
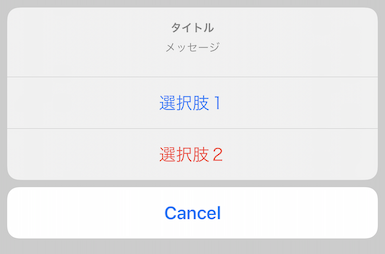
ボタンの見た目
ActionSheet内のボタンの見た目はちょっとだけ指定できます。
| .default | 青文字 |
| .destructive | 赤文字 |
| .cancel | 青文字、一番下に表示、ひとつしか置けない |
struct ContentView: View {
    @State private var shownActionSheet = false
    var body: some View {
        Button("Action Sheet表示", action: {
            self.shownActionSheet = true
        })
        .actionSheet(isPresented: $shownActionSheet){
            ActionSheet(
                title: Text("タイトル"),
                message: Text("メッセージ"),
                buttons:[
                    .default(Text("選択肢1")){
                        print("選択肢1")
                    },
                    .destructive(Text("選択肢2")){
                        print("選択肢2")
                    },
                    .cancel()
                ]
            )
        }
    }
}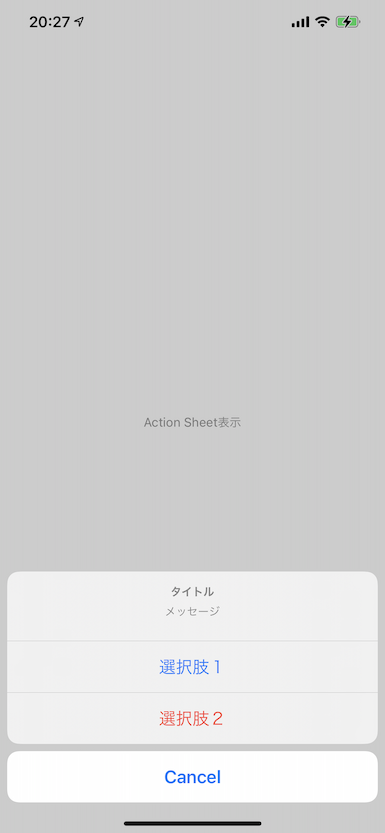
見た目はこんな感じ。


コメント