
今回はSwiftUIのText等を使った際の Localization の方法を説明します。
とは言ってもUIKitとほとんど変わりません。
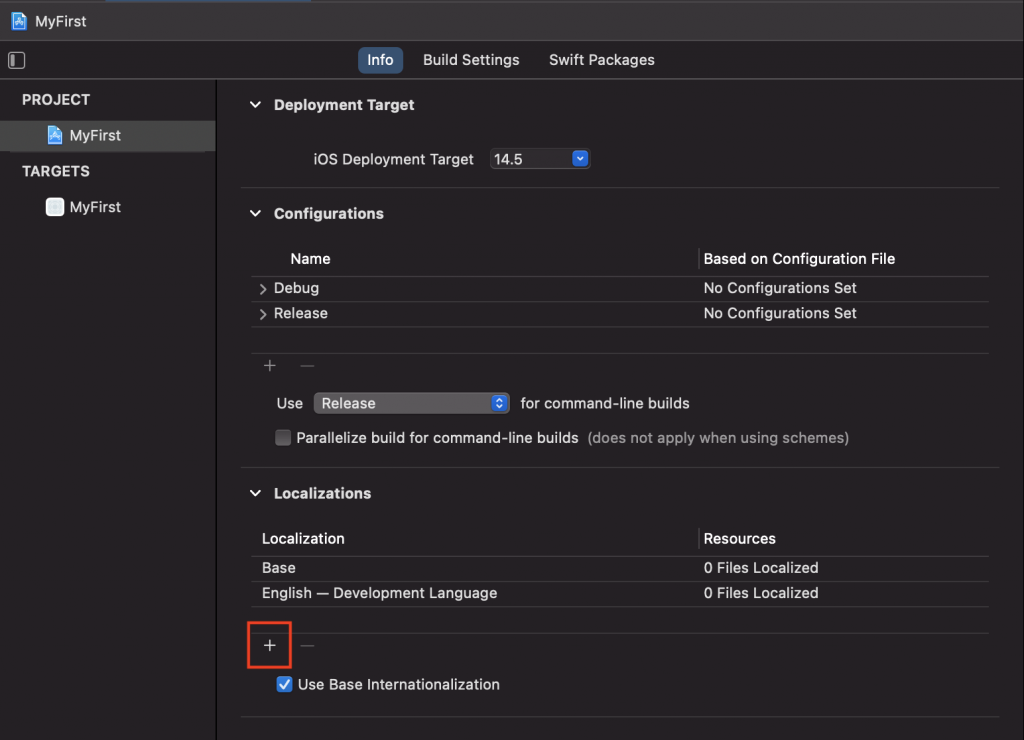
1- プロジェクトにLocalizationを追加
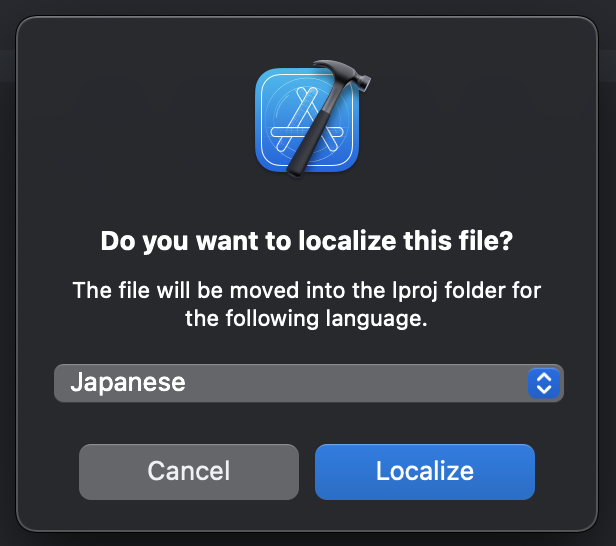
まずはプロジェクトに必要な言語の追加をします。
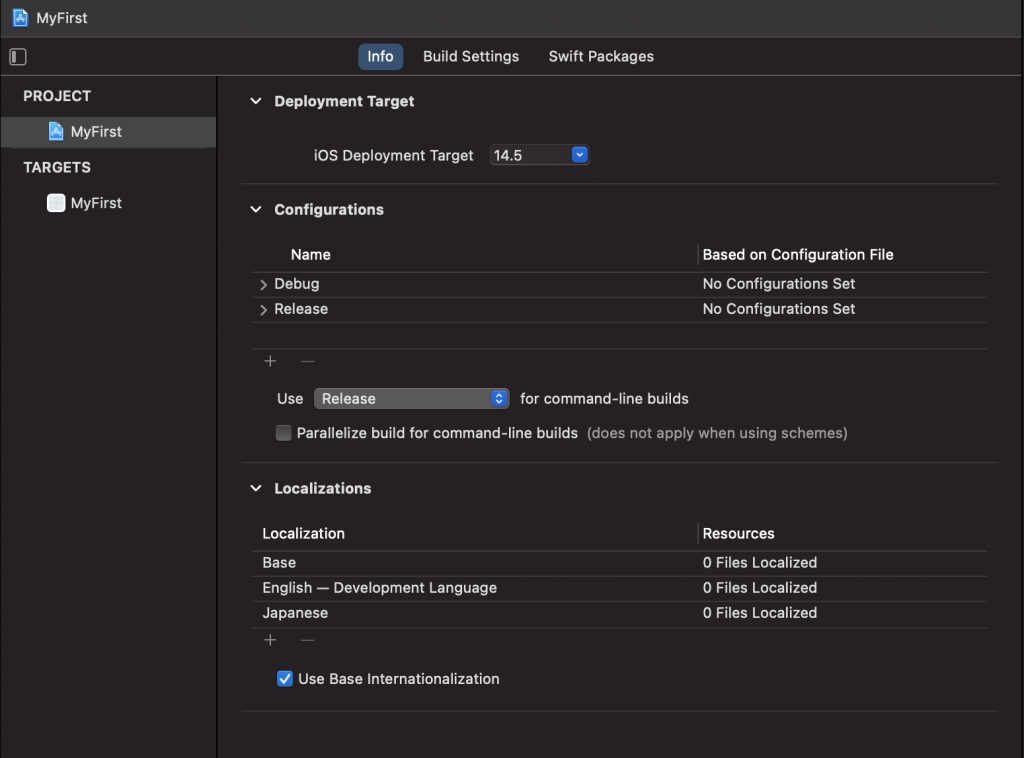
プロジェクトのLocalizationの項目にある”+”ボタンを押すと言語の一覧が表示されます。必要な言語を選択して追加しましょう。今回は日本語を追加します。
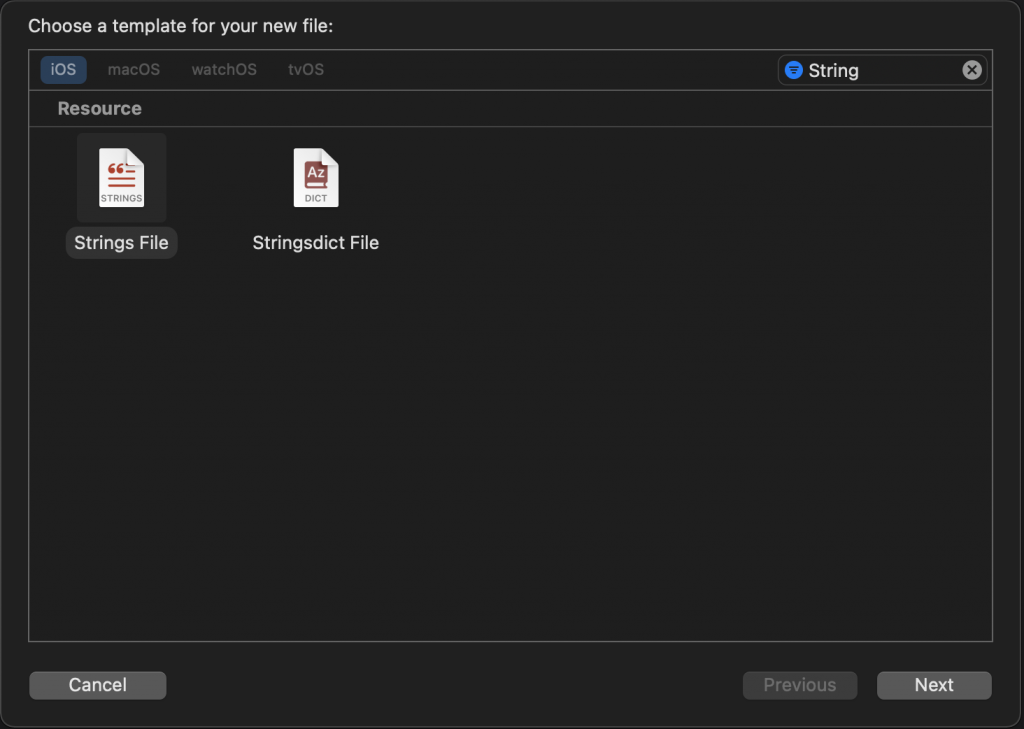
2- Localizable.strings ファイルの作成
Localizable.stringファイルを作りましょう。
Xcodeの「New Flie… 」からStringsファイルを選択し、 Localizable.stringsというファイル名で保存します。

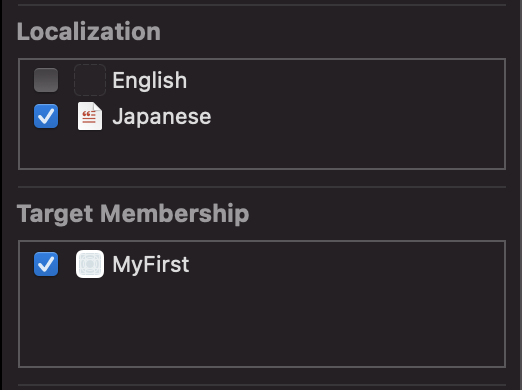
作成されたLocalizable.stringsを選択した状態で、Xcode右側のFile Inspectorの”Localize…”を押します。
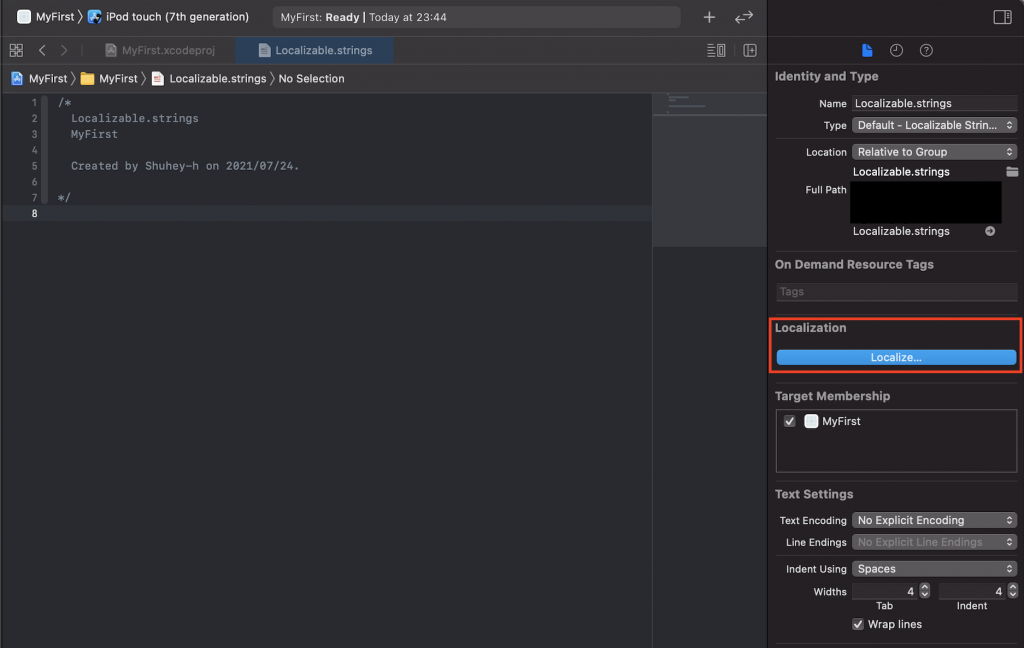
そして追加したい言語を選択します。
あとは以下のようにテキストを記述していくだけです。
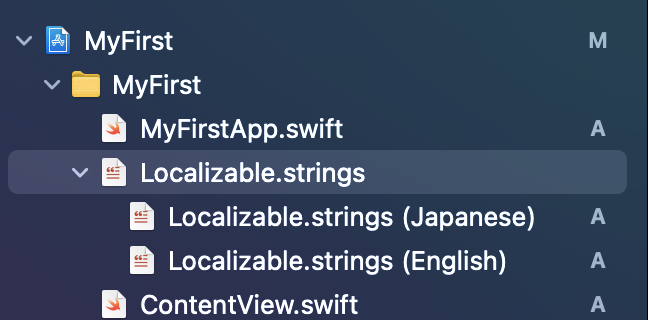
"hello" = "こんにちは";言語を追加したい場合は、Localizable.stringを表示し、右側のLocalizationから追加した言語にチェックを入れてください。
するとこのように言語ごとのstringファイルが作成されます。
3- ローカライズされたテキストを表示
SwiftUIにおいて文字列指定されたテキストは、ローカライズキーとして扱われます。つまり特別なことをしなくてもローカライズされて表示されます。以下のようなレイアウトを言語設定が日本語の端末で表示すると、
struct ContentView: View {
    var body: some View {
        VStack {
            Text("hello")
                .padding()
        }
    }
}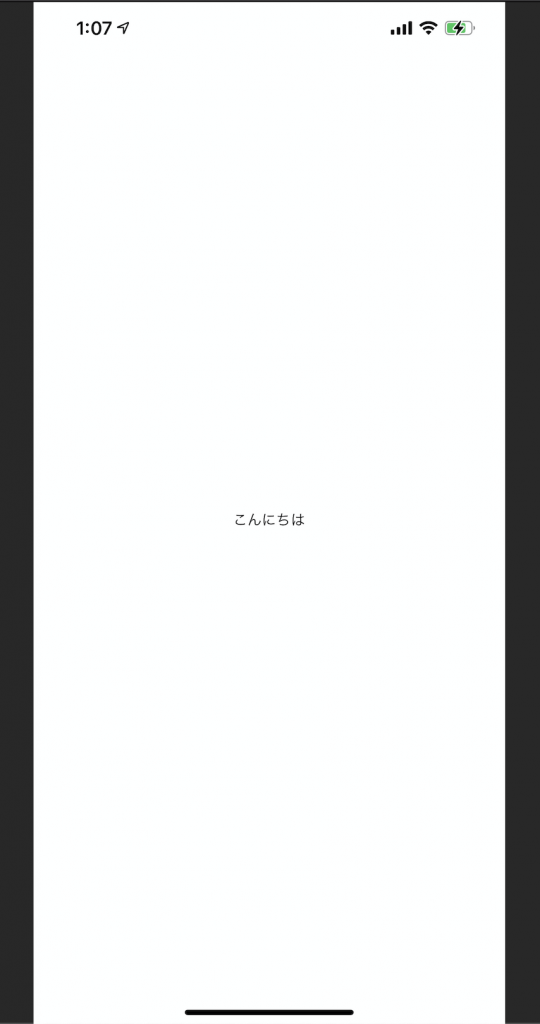
このようにローカライズされたテキストが表示されます。
質問、間違っている点などありましたらコメントください。

コメント