今回はSwiftUIで区切り線を引く際に使用されるDeviderの使い方について説明していきます。
環境
- Xcode13.0
- 動作はシミュレーターのiPhone13 miniで確認
基本的な使用方法
Dividerの宣言は非常にシンプルで引数はありません。
struct ContentView: View {
    var body: some View {
        VStack {
            Text("UP")
            Divider()
            Text("DOWN")
        }
    }
}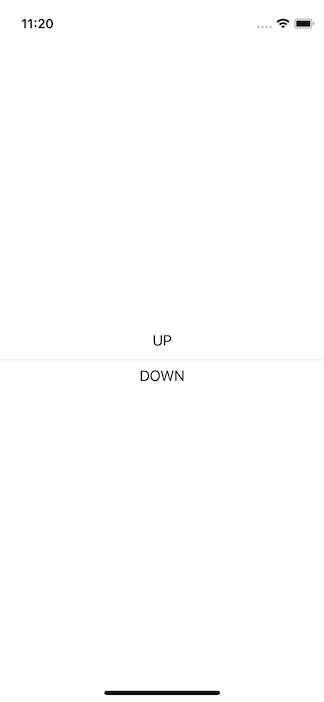
VStackの中で使用すると横線を引けます。
struct ContentView: View {
    var body: some View {
        HStack {
            Text("UP")
            Divider()
            Text("DOWN")
        }
    }
}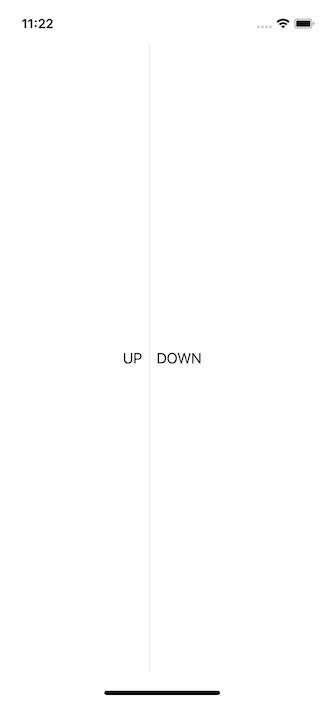
HStackの中で使用すれば縦線になります。
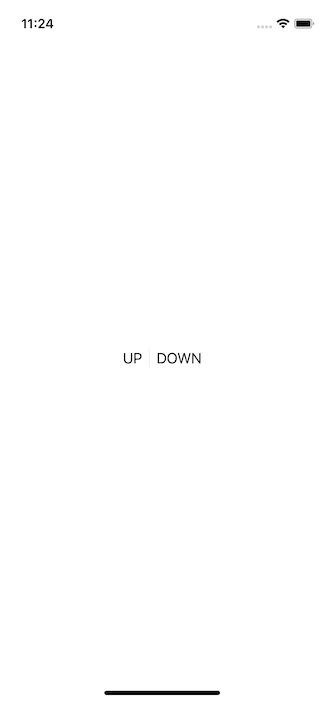
高さと幅の調節
ちなみに、文字などの区切りたい要素と同じ高さ(または幅)の線を引きたい場合は、fixedSize()を使用しましょう。
struct ContentView: View {
    var body: some View {
        HStack {
            Text("UP")
            Divider()
            Text("DOWN")
        }
        .fixedSize()
    }
}
線の色を変える
区切り線の色を変えたい場合はbackground()を使用します。
struct ContentView: View {
    var body: some View {
        HStack {
            Text("UP")
            Divider().background(Color.red)
            Text("DOWN")
        }
        .fixedSize()
    }
}

コメント